
Building a Virtualized Business File Server with TrueNAS SCALE & VirtualBox
Updated: Jul 29
As businesses scale, managing unorganized data, loose file shares, and inadequate backup strategies becomes a recipe for disaster. Recently, I took on a project to design and build a realistic, enterprise-grade Network Attached Storage (NAS) sandbox from scratch for a fictional company.
The goal? Create a highly secure, resilient, multi-department file server environment using Oracle VirtualBox and TrueNAS SCALE.
Here is a look inside the architecture, implementation, and core features of this home lab deployment.
Architectural Blueprint & Design Goals
The objective for the company was straightforward but critical: build a central repository for corporate data that ensures strict data security, user accountability, cross-platform accessibility, and modern disaster recovery pipelines.
To keep the environment entirely isolated, I designed a two-tier network architecture within the hypervisor:
                    Host Computer
                  Windows 10/11 PC
                         |
                         |
                  Oracle VirtualBox
                         |
              ---------------------
              |
              |
          TrueNAS SCALE
              |
              |
       -------------------
       |        |        |
      ZFS     SMB     Snapshots
    Storage   Shares   Recovery

        | (Optional Windows Client)
        v
   Access Shares
The Storage Engine: Why ZFS & RAIDZ1?
Instead of traditional hardware RAID or basic volume formatting, I deployed the enterprise ZFS (Zettabyte File System) via TrueNAS SCALE. To achieve data parity and fault tolerance, I provisioned three independent 100 GB virtual disks bound together into a RAIDZ1 storage pool. This specific configuration balances high capacity with the ability to withstand a complete drive failure without data loss.
Workspace Setup & Virtual Infrastructure
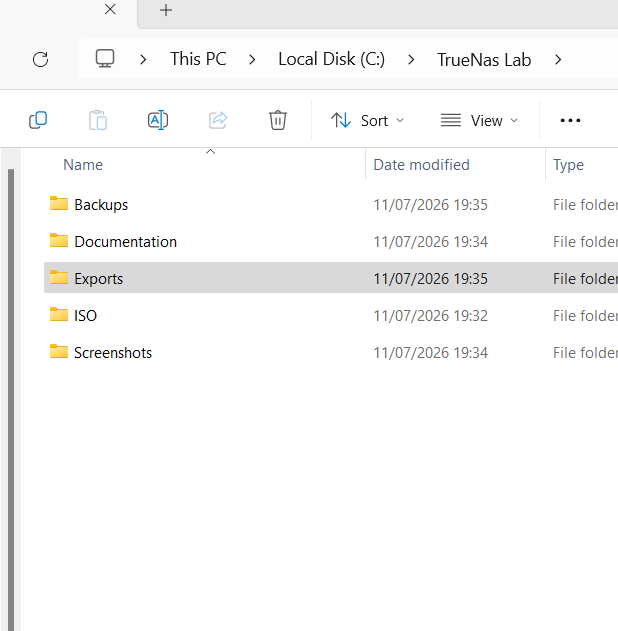
Before spinning up the server, I established a strict organizational structure on the host machine to manage project media, configuration scripts, and target backups.
C:\TrueNAS-Lab
├── ISO
├── Screenshots
├── Documentation
├── Backups
└── Exports
Provisioning the TrueNAS Engine
Within VirtualBox, I provisioned the underlying node (TrueNAS01) under a 64-bit Linux kernel architecture.
To satisfy the demanding memory and processing requirements of ZFS data management, I allocated 8192 MB of RAM, 4 vCPUs, and checked Enable EFI Boot for modern systems compatibility.


The Mass Storage Layout & Networking Architecture
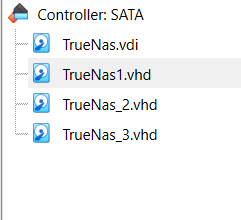
A core design best practice implemented in this project was the absolute separation of the operating system from the data layer.
The Boot Drive: A separate 32 GB virtual disk dedicated exclusively to the TrueNAS SCALE system files.
The Storage Pool: Three distinct 100 GB VDI disks mapped sequentially to handle company documents.
Network Segmentation
Security requires network isolation. I configured dual virtual network interface cards (NICs) on the appliance:
Adapter 1 (NAT): Used strictly as a secure outbound gateway for software system modifications and update packages.
Adapter 2 (Internal Network): Named TrueNAS-Lab, this isolated network handles private corporate traffic, keeping network discovery and SMB mapping securely hidden from external networks.


TrueNAS SCALE Deployment & OS Initialization
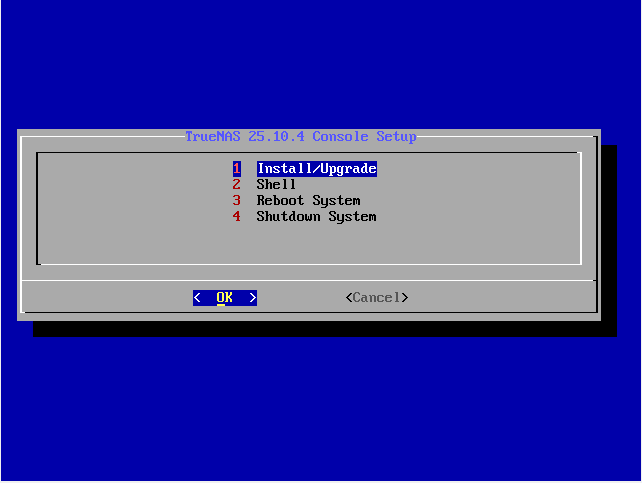
With the virtual hardware active, I mounted the TrueNAS SCALE installation media and initialized the setup script, ensuring the installation target pointed exclusively to the 32 GB boot drive while preserving the data disks for the upcoming storage pool.

Core System Configurations & ZFS Provisioning
Once inside the management portal, I performed key system administration configuration tasks:
Set the network identity to truenas01.
Assigned a static IP of 192.168.1.50/24 with a gateway of 192.168.1.1 to ensure endpoints wouldn't lose connection due to standard lease renewals.

Next, I built the storage architecture. I aggregated the three raw 100 GB virtual drives into the primary corporate pool named CompanyData, selecting RAIDZ1 to ensure data resiliency across the array.

Implementing Security Governance: RBAC & Datasets
To mimic a real corporate environment, I divided the main storage pool into specific, independent Datasets (HR, Finance, IT, Marketing, Public, and Backups). This approach allowed me to apply unique storage quotas, flags, and encryption parameters down the line.
Plaintext
CompanyData
 ├── HR
 ├── Finance
 ├── IT
 ├── Marketing
 ├── Public
 └── Backups

Role-Based Access Control (RBAC) & Permissions
To enforce the Principle of Least Privilege, I created distinct local user accounts (mary, john, fabio) and mapped them to customized system security groups (HR, Finance, IT).
By modifying the underlying Access Control Lists (ACLs), I locked down departmental boundaries:
The HR dataset grants full read/write access only to the HR group.
The Finance dataset restricts visibility strictly to the Finance group.
The Public dataset remains open to all users to allow cross-departmental collaboration.


File Sharing & End-to-End Testing
To bridge the gap between our headless Linux backend and corporate endpoints, I broadcasted the datasets as network shares using the Server Message Block (SMB) application protocol.
Plaintext
/mnt/CompanyData/HR   --> Shared as: HR
/mnt/CompanyData/IT   --> Shared as: IT

To verify the system worked as intended, I logged into an isolated Windows 11 virtual client machine on the TrueNAS-Lab network, fired up the Run dialog tool (\\192.168.1.50), and authenticated as a user. The client successfully mounted the shares, verifying that my ACL permission boundaries blocked unauthorized access while granting full read/write privileges to matching departments.


Advanced Data Protection: Snapshots & Backup Operations
A server is only as good as its recovery plan. To protect the company from accidental file deletions and ransomware attacks, I designed a two-tiered backup strategy:
Automated ZFS Snapshots: Configured an automated snapshot policy to capture dataset states hourly, retaining copies for a rolling 7 days. Because ZFS snapshots are incredibly lightweight, this provides quick recovery points without wasting system resources.
Local Replication Pipelines: Established an independent backup routine to automatically replicate core files from active department drives into a separate Backups dataset storage pool.


Project Retrospective & Key Takeaways
Building this project was a fantastic exercise in systems administration and storage architecture. Working through the setup highlighted how critical proper planning is before allocating hardware resources.
By taking the time to separate data paths from the OS and carefully map out security groups early on, I was able to build an incredibly secure, stable storage environment that mirrors real-world enterprise infrastructure.


Comments